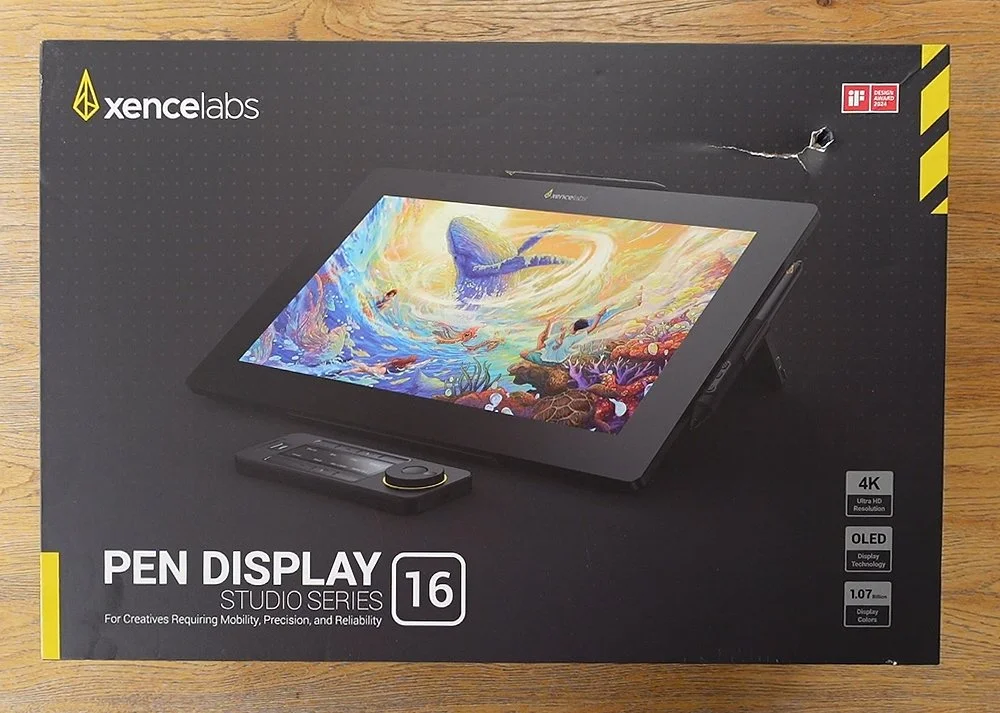
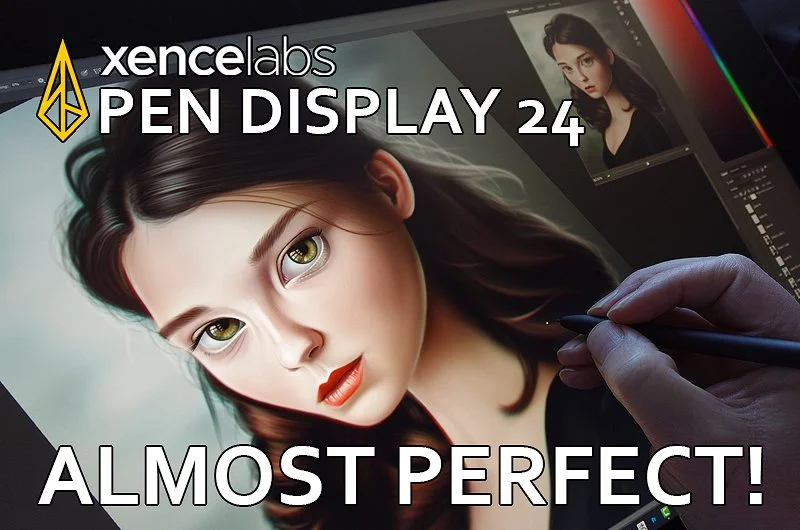
Xencelabs Pen Display 16
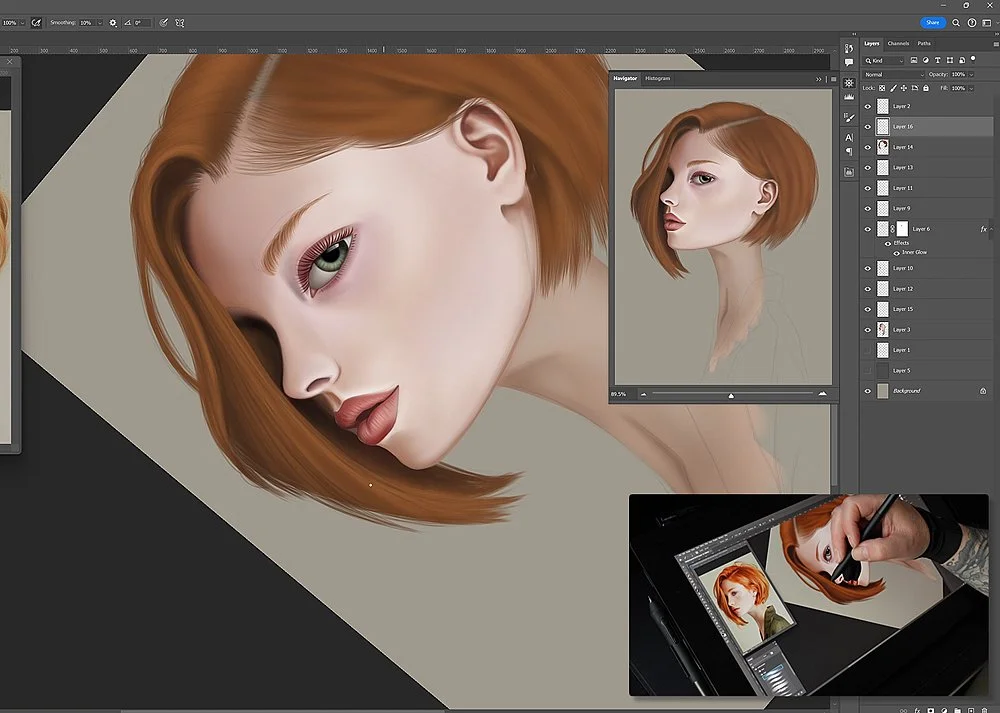
It’s no secret that the Xencelabs Pen Display 24 is one of my favourite pen displays. When I reviewed it back in 2023, I said “There’s a lot to love with the Pen Display 24, but for me personally, if this had a touch screen too, it would be pretty much perfect.” It’s a device I use daily for both 2D and 3D work, but it is quite big, so not something you can relocate easily. Its not heavy, just big, so takes up a lot of desk real estate.
I work in a tiny office, so space is at a premium and I find I am constantly needing to move the PD24 as I need the desk space for other things, so I’ve been keeping an eye out for a smaller solution.
The Wacom Movink had potential but its only currently available in 13 inches. The Huion Kamvas 16 (Gen 3), which I recently reviewed, looked promising too, but when I heard Xencelabs had released a 16-inch version of their Pen Display 24 I got very excited.
Now I’ve spent some time with it, does it live up to the quality of its big brother or is bigger always better?
Read on to find out…
Essentials vs The Bundle

There are currently two options available to you with the Pen Display 16, the essentials package and the bundle. These differ in price and contents so it’s worth taking some time to consider which is the better option for you, and deciding may not be straight forward depending on your own setup.
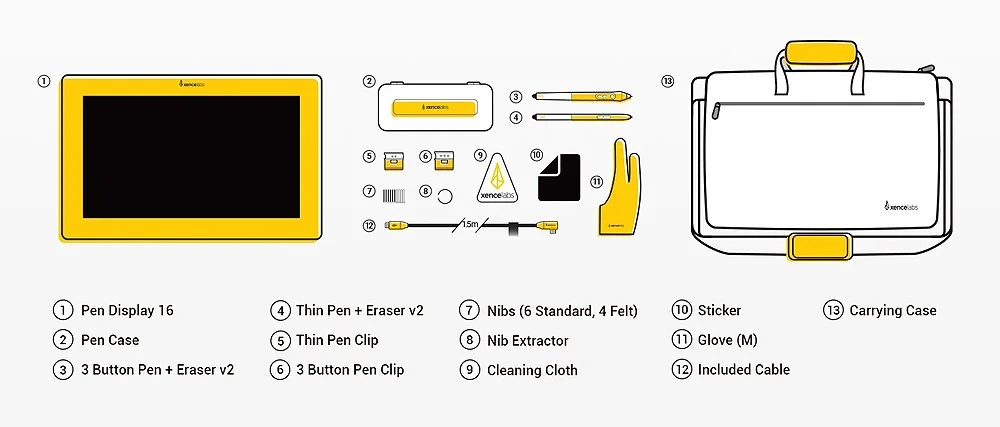
The essentials option is £969, so certainly not cheap, but with this you get the device, two pens - a thick three button pen and a slim pen, a single USB-C cable plus a very nice carry case. There are also other accessories like the clips to attach the pens to the pen display and an artist’s glove. So, all in all this isn’t such a bad option for the price.
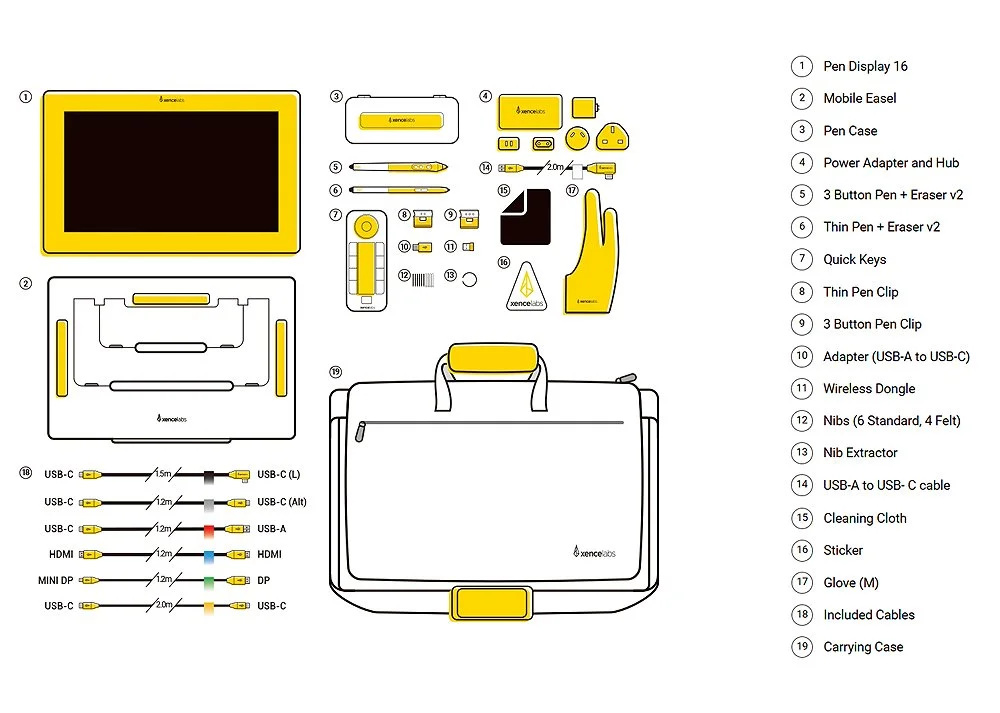
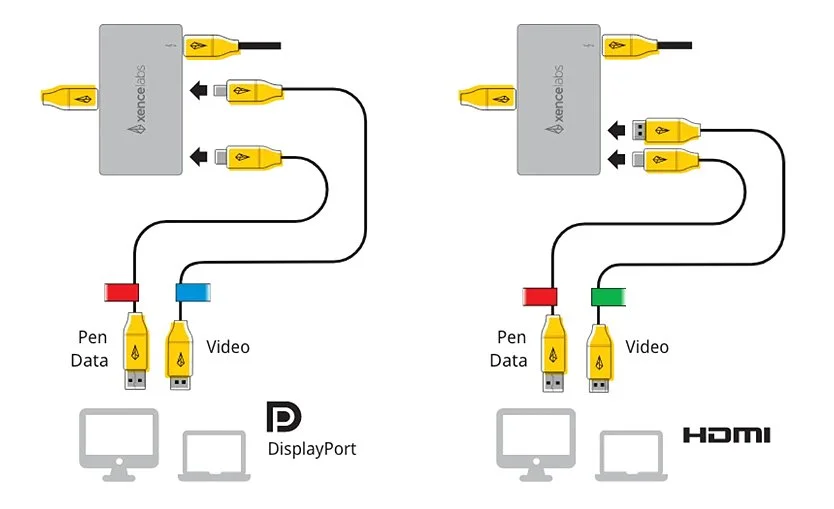
The bundle is more expensive at £1,199 but you do get a lot more. As well as everything in the essentials package you also get the Quick Keys remote, a stand which Xencelabs call the “Mobile Easel” plus a lot more options when it comes to connectivity with the addition of the hub and various USB, HDMI and Display Port cables.
Initially, the essentials package does look like the better option if you feel you won’t use the other accessories. With a device of this size, you could quite happily have it sat on your desk and use a keyboard directly, meaning you could skip the Quick Keys remote. With the mobile easel, you probably already have a stand of some sort lying around so could get away without it.
One thing to be aware of with the essentials package is the single USB-C cable. Now, if you have a USB-C port which is Display Port Alt enabled, you have nothing to worry about, but if you have a slightly older computer, like I do, you are going to need the extra hub and cables.
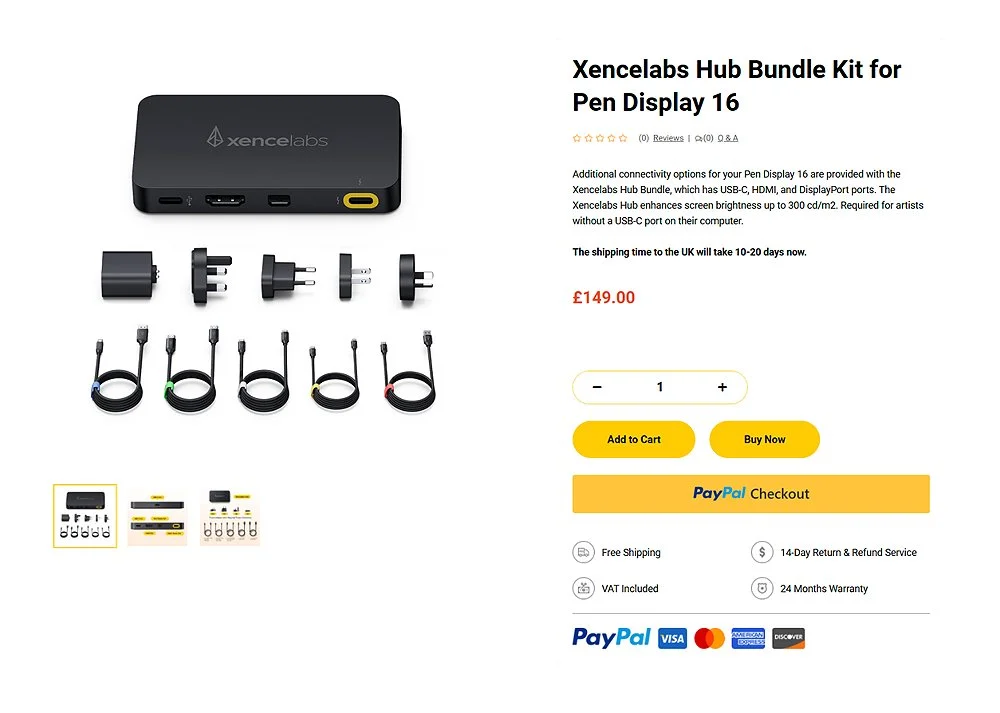
This being the case you would then need to part with an additional £149 for those meaning you would have spent a total of £1,118.
So for just a bit more you could’ve got the whole bundle in the first place.
As a test I tried to use another USB-C hub along with some random cables I had in my office, but they didn’t work, or if they did the display was very unstable, so it seems you need to use Xencelabs own hub and cables.
I did ask Xencelabs, and they said that it will only work with their own hub, but you could use other cables that support 4K. I tried two but neither were stable unfortunately.
Just something to consider if you’re thinking of investing in the Pen Display 16, so if you are at all unsure or don’t have a compatible USB-C port, the bundle is the safer option.
Unboxing
The box for the bundle is quite big but it needs to be with everything packed inside it, although mine came slightly damaged but luckily this didn’t affect the contents.
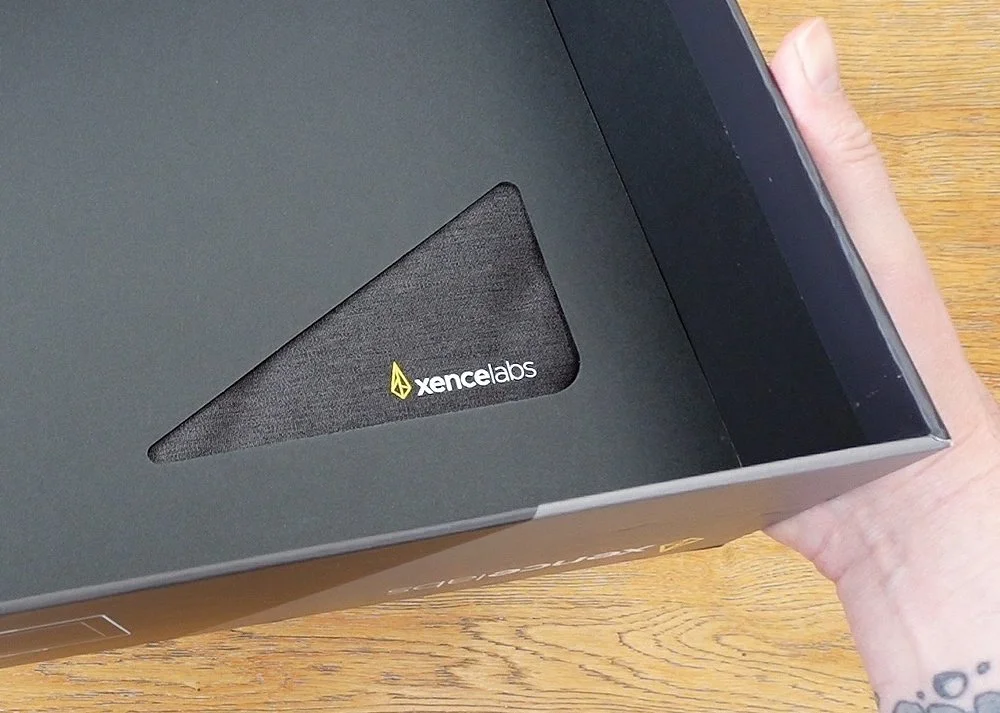
Don’t be concerned when lifting the lid, as it feels heavier than it should. Tucked inside is the case, but we will come back to that later.
The first thing you see are the thank you note plus a sheet with installation instructions illustrating the various options available and beneath this is the Pen Display 16 in a thin protective cover.
We then have the Mobile Easel, and this gives way to a deeper section of the box where you will find the pen case, Quick Keys remote, connection hub and the clips which hold the pens onto the side of the display. Here you will also find the first USB-C cable, this is the main cable you will use if connecting directly to your computer.


In the very bottom of the box are the power adapter plus various regional plugs as well as more cables which you use with the hub. These include a Display Port to mini Display Port, HDMI cable, two USB-C to USB-A cables and two USB-C to USB-C cables.

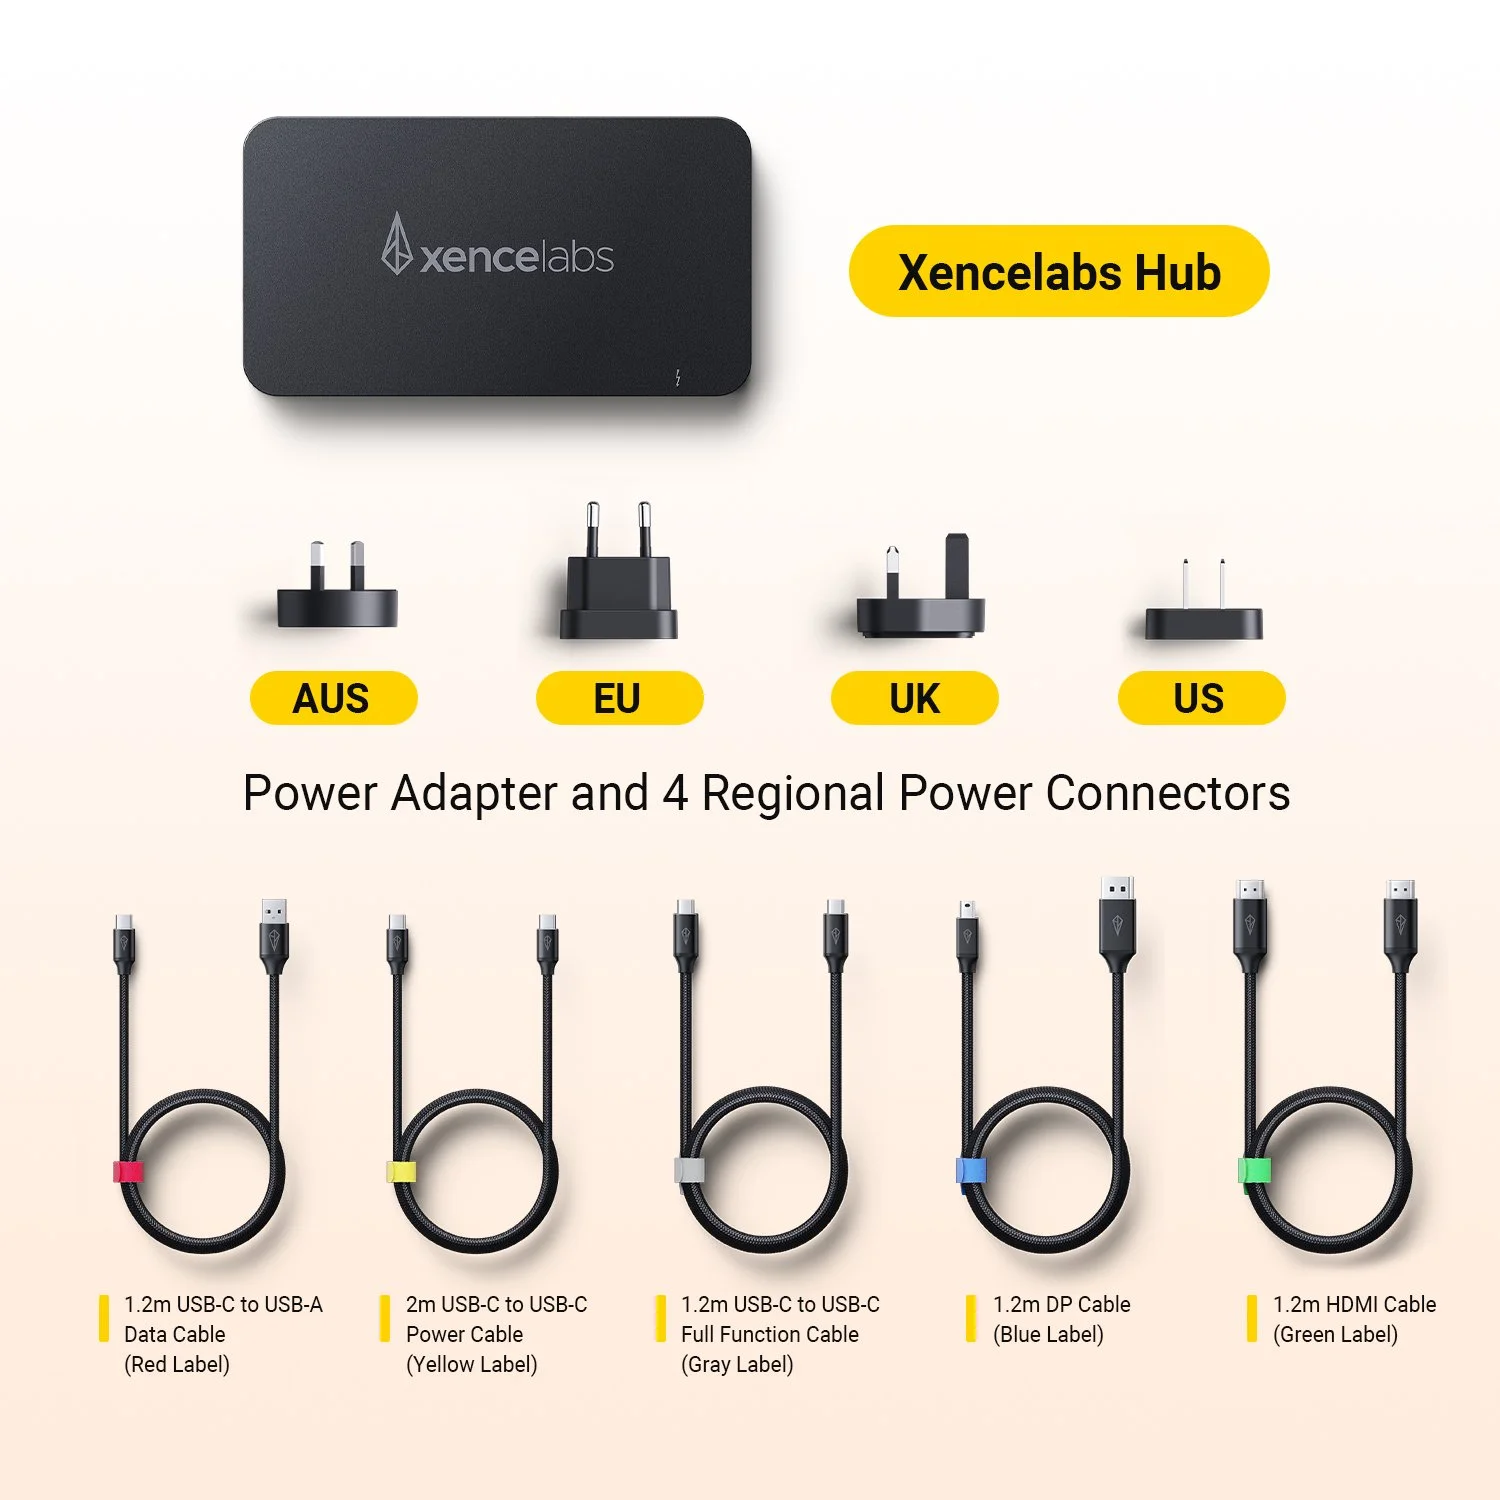
This seems excessive but the cables are all colour coded, and this is to help when setting up the device as each has a specific role, so be sure to follow the instructions.
Finally, Xencelabs also give you an artists glove, cleaning cloth and and instruction leaflet.
The Tablet
The Pen Display 16 does look like a shrunken version of the Pen Display 24. Its sleek and minimalistic but is missing the three touch buttons its big brother has. It has the same Super AG Etched display which minimizes reflections and glare plus adds a nice texture to the screen as you draw.
Its just 12 milometers thick and weighs only 1.2kg so its very light and portable.
Around the sides are a single USB-C port and the power button, plus a series of grooves which are used to place the pen holder clips.
On the back are four rubber feet which stop it slipping on the desk or moving while on the easel.
So, as you can see, there’s no additional buttons or ports hidden away, its stripped back to the bare minimum, which is probably why they have been able to make it so slim, but I also think this makes it feel more like a high-quality product.


The Mobile Easel
Even the stand which comes in the bundle feels stylish with its ridged design. Its quite large though which isn’t a bad thing as it means the Pen Display 16 sits comfortably on top, and the non-slip pads help to keep it steady.
The downside is there are just two angles available, eighteen and thirty-two degrees, but I found these were enough for my needs.
In use though the stand was very stable, and I liked how it was the same size as the pen display too
The Pens
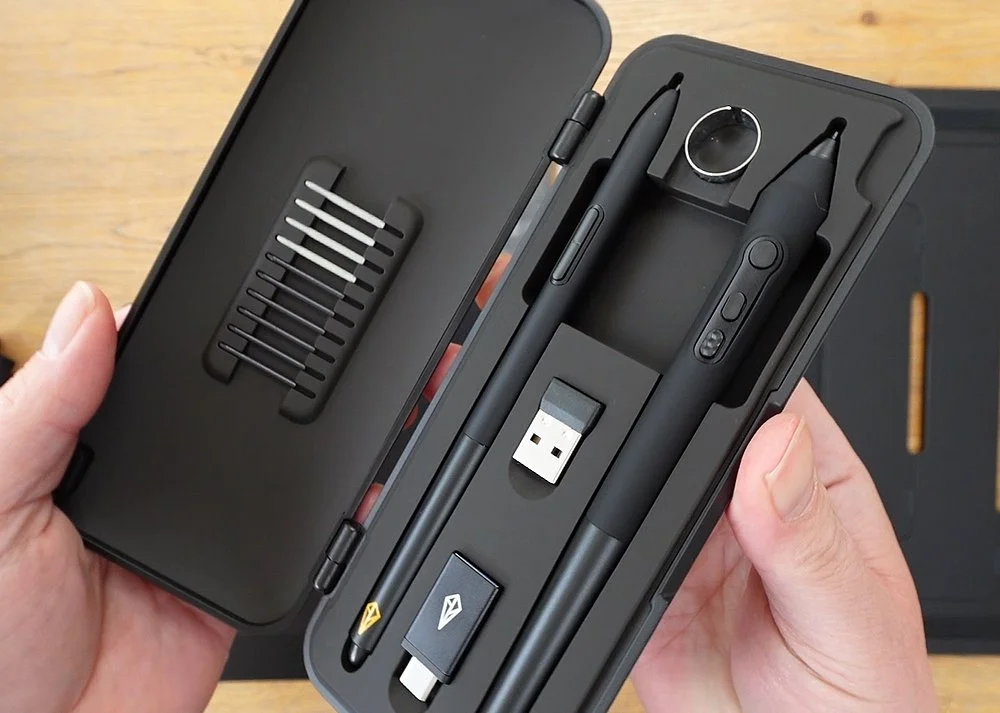
Xencelabs are very generous when it comes to pens, and with each device, they give you both a slim pen, and a thicker three button pen. Both also have erasers on the end, and they come in a handy carry case. Inside here you will also find the dongle for the Quick Keys remote.
The pens are comfortable to hold and have a rubber grip, with the buttons being easily accessible as you work.
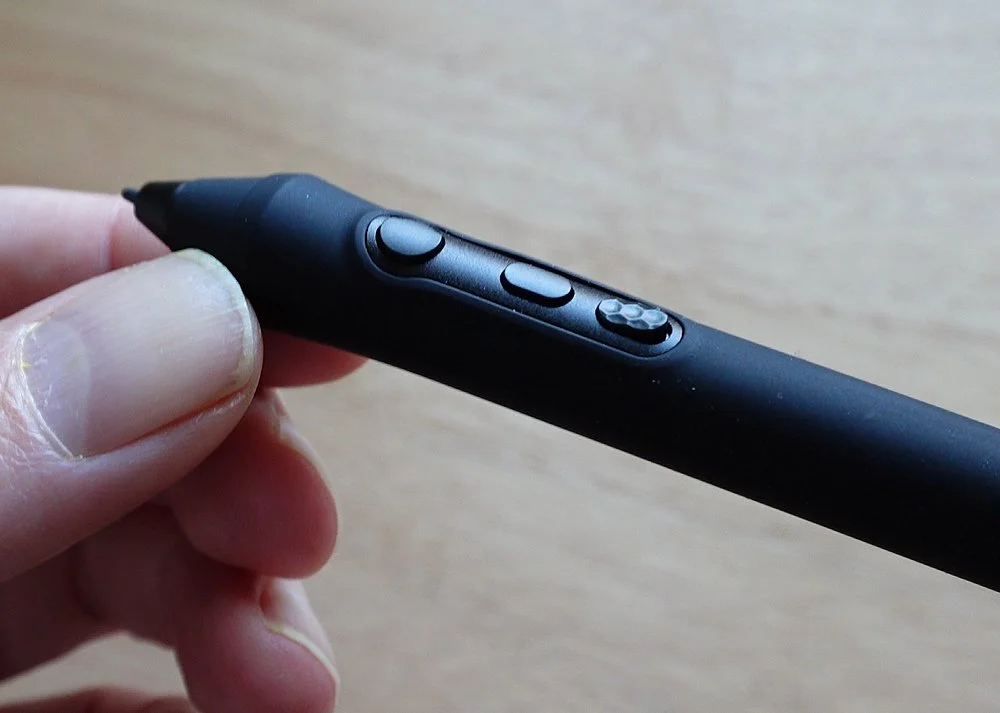
The buttons on the three-button pen are all slightly different too in size and style, with one having ridges so you can quickly distinguish between them without needing to glance away from the screen.
From a technical point, they offer 8,192 levels of pressure sensitivity, 60 degrees of tilt recognition and are battery free. They instead work on electro magnetic resonance technology.
In addition to the pens, you are also given 10 extra nibs, 6 standard and 4 felt so you can configure the type of feeling you want as you work. There’s also a handy ring which helps you remove the nibs too.
The Quick Keys Remote
Having reviewed Xencelabs Pen Display 24 and their Pen Tablet previously, which both also included the Quick Keys remote, I’m no stranger to it and its still one of my favorite hotkey remotes.
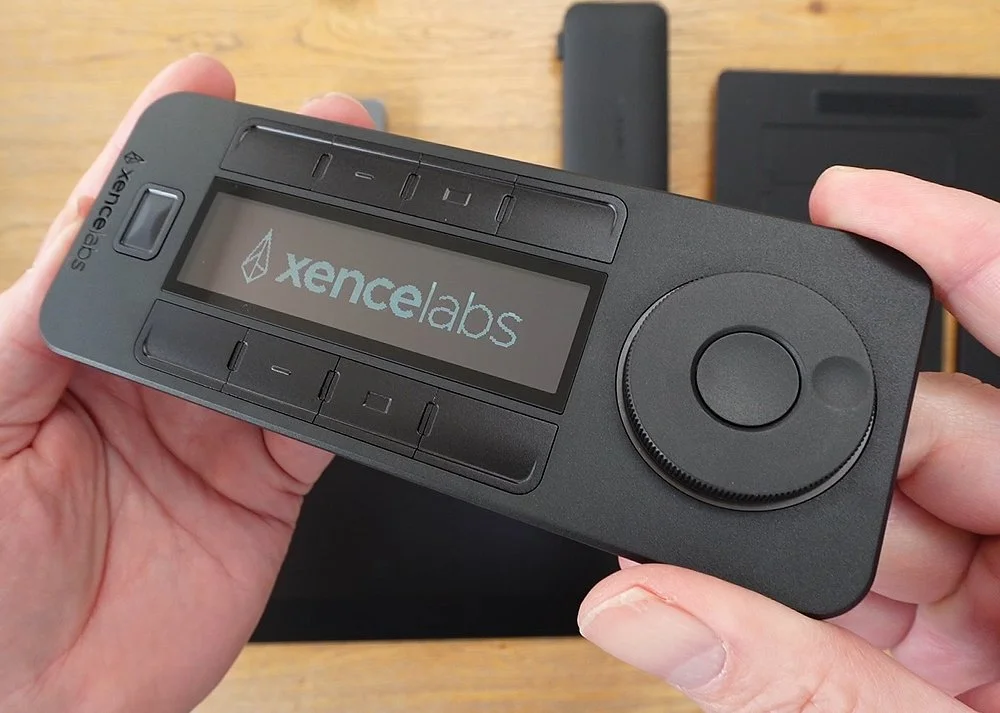
Its light and easy to hold, plus you can use it in any orientation to suite your working style.
As for configuration options you are truly spoilt. There are eight buttons in total, and you can toggle between five sets giving you a total of forty shortcuts per application.
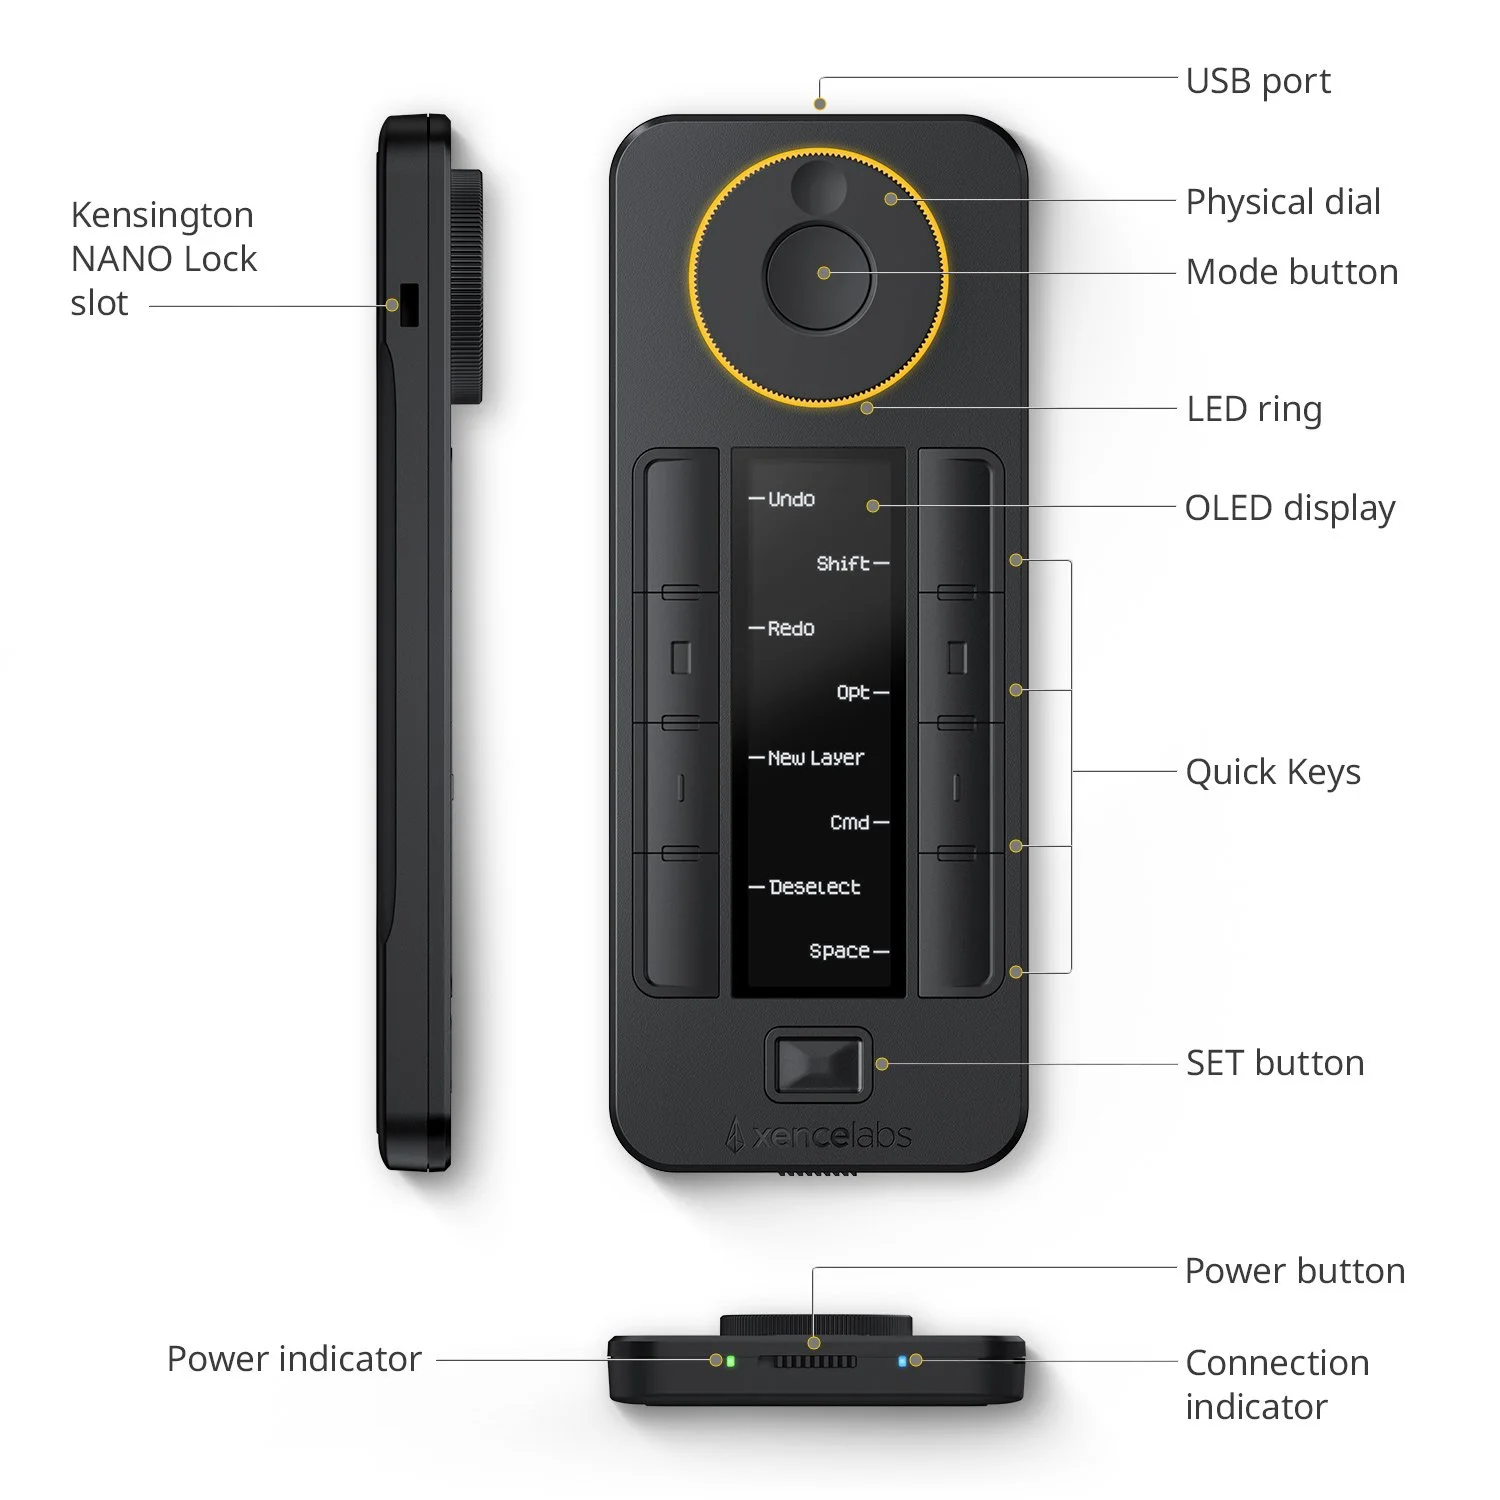
You also have a dial and the button in the middle is used to change what it does, cycling through four predefined options.
So, you could quickly swap between brush size and division levels in the same application if needed, and the wheel colour changes too, to represent what you have it set to.
What’s more, all the buttons and the dial can be configured differently for each application.
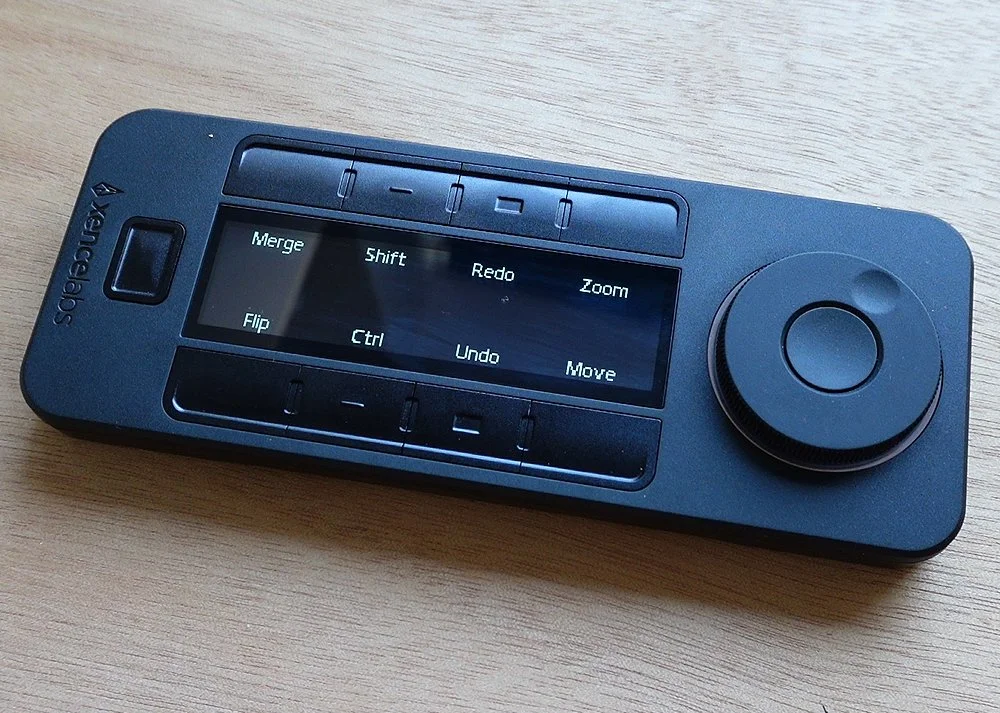
Down the centre is an OLED panel, and I do love this feature. It helps to remind you of what each button is currently set to do, which as you can imagine, when you have forty different settings is useful.
I’m always forgetting what each button is setup to do in each application, so with this remote, a quick glance can help me find my way rather than guessing and pressing the wrong one.
Battery life is very generous too and it’s said that it can last anywhere up to fifty hours on a single charge.
On a side node the Quick Keys remote is also sold separately so could be a handy addition to your desk, even if you don’t own any other Xencelabs devices.
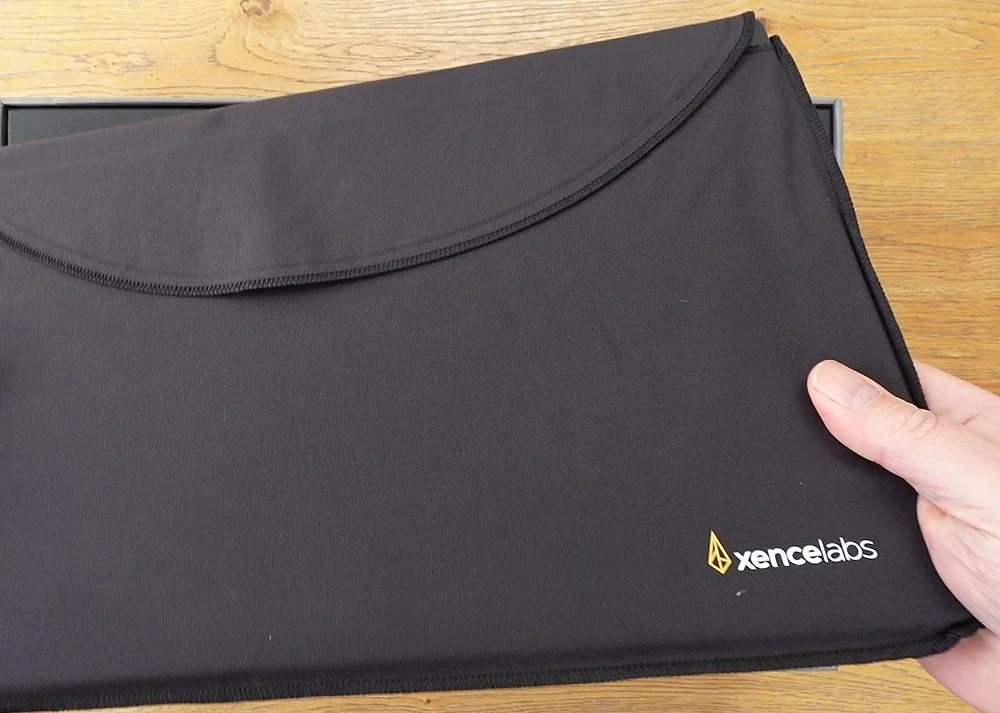
The Case
It’s great that Xencelabs also give you a carry case for the Pen Display 16. It’s meant to be a portable device so this just helps to push that idea forward.
Its feel luxurious and well-padded with plenty of pockets for all the accessories with the zips feeling tough and of good quality too.
The pocket meant for the pen display is fur lined too so it will keep the pen display in top condition and even clean the screen as you travel.
Setup
If you have a compatible USB-C port, setup is painfully simply, you just plug in the device, install the drivers and you are good to go. If your computer or laptop doesn’t supply sufficient power to the pen display the screen won’t reach its full brightness levels, but you can use the hub to give it a boost.
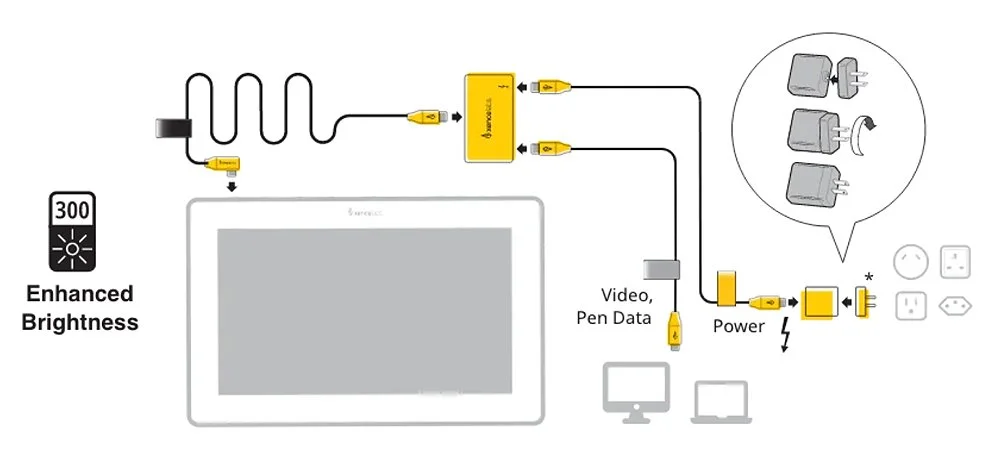
Alternatively, if your USB-C port isn’t Display Port Alt enabled you will need to use the hub anyway plus the additional cables.
You will need to use the cables Xencelabs supplies though, as mentioned, I tried to use my own, longer cables but the display became unstable.
Once connected and the drivers are installed you may find that the cursor is misaligned slightly, this was certainly the case with me. The good news is there is an easy fix.
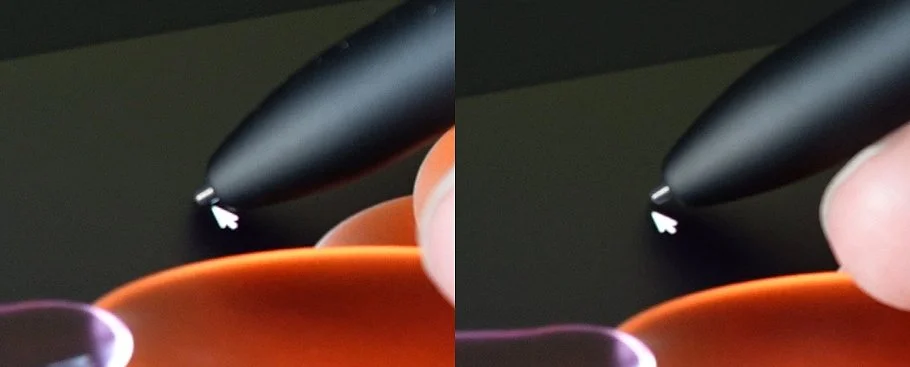
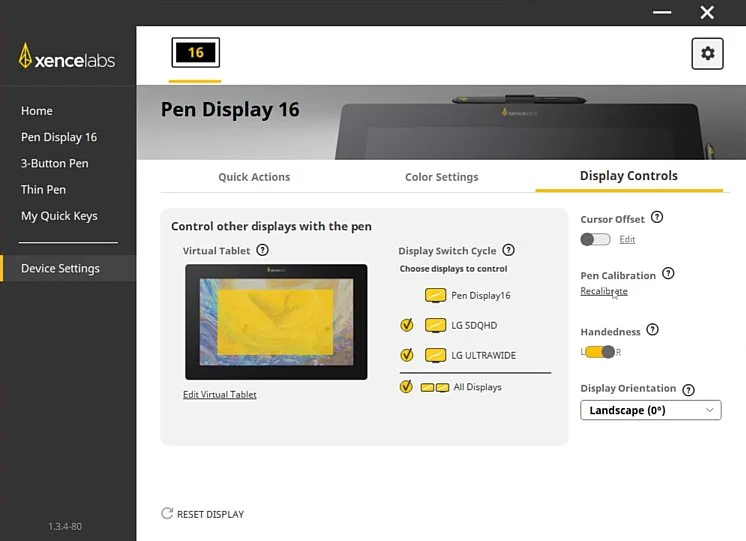
In the Xencelabs software go to the Device Settings tab and then go to the Display Controls option.
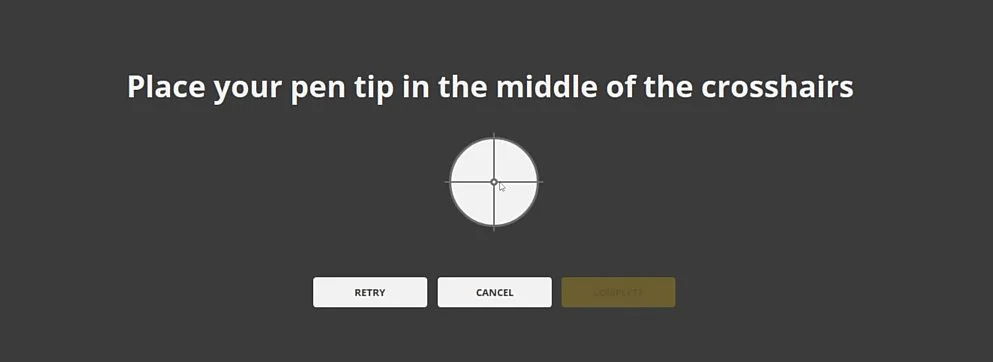
In here there is a Pen Calibration tool which will allow you to realign the cursor, and it does this in the usual way by asking you to click on five key points around the display.
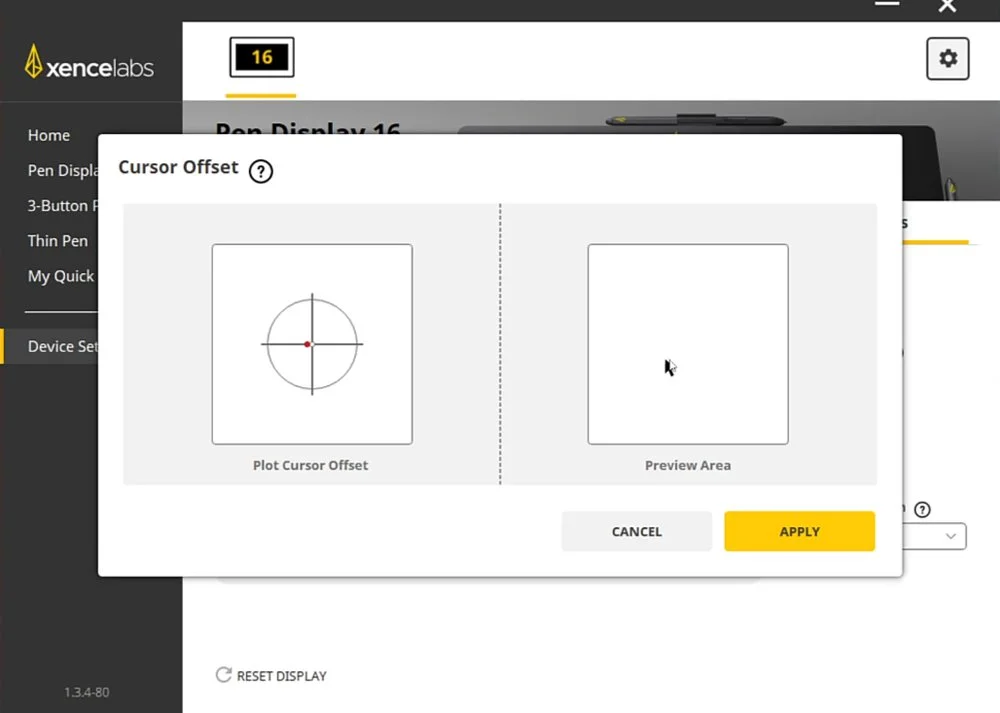
If this still doesn’t fully align the cursor you can then use the Cursor Offset option to do any last-minute tweaking.
The Screen
When I reviewed the Pen Display 24, I was blown away with the quality of the screen, but the OLED display on the Pen Display 16 takes things to another level. Its truly gorgeous and you must see it really to appreciate it.
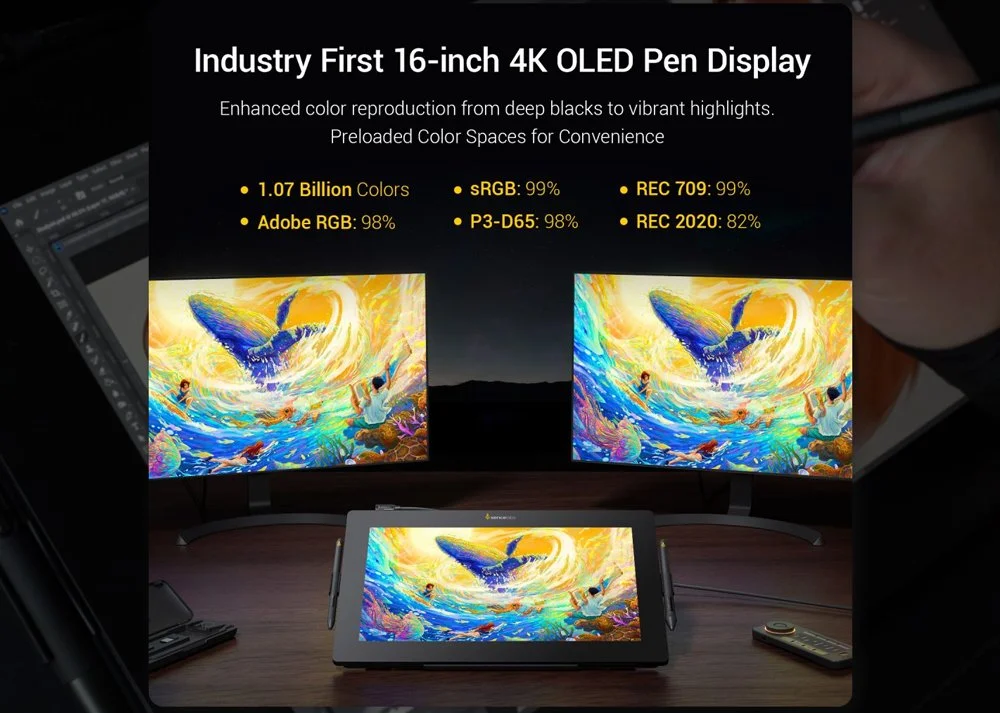
Just like its bigger brother, the Pen Display 16 is said to be capable of displaying over one billion colours and has 98% Adobe RGB and 99% sRGB colour space coverage plus boasts a high contrast ratio of 100,000:1.
Xencelabs utilise Super-AG etching which dramatically reduces glare and reflections. Even with the screen off you can see how the light gently spreads across the surface rather than being directly reflected.
It’s this etching which also offers that all important bit of friction as you work, but the downside is the display isn’t as crystal clear as you would expect. Don’t get me wrong, its very close but there is a slight bit of grain visible, as you tend to get with these devices. It’s a trade off, and one I am happy to have and to be fair, most people probably won’t even notice.
What I am undecided on is the 4K resolution. Don’t get me wrong its great to have, but is it noticeable on a screen of this size? With most applications once you get over a certain resolution you need to increase the UI size anyway. I did do a few quick tests, swapping between 4K and 2.5K and there was a very subtle difference if you really looked closely.
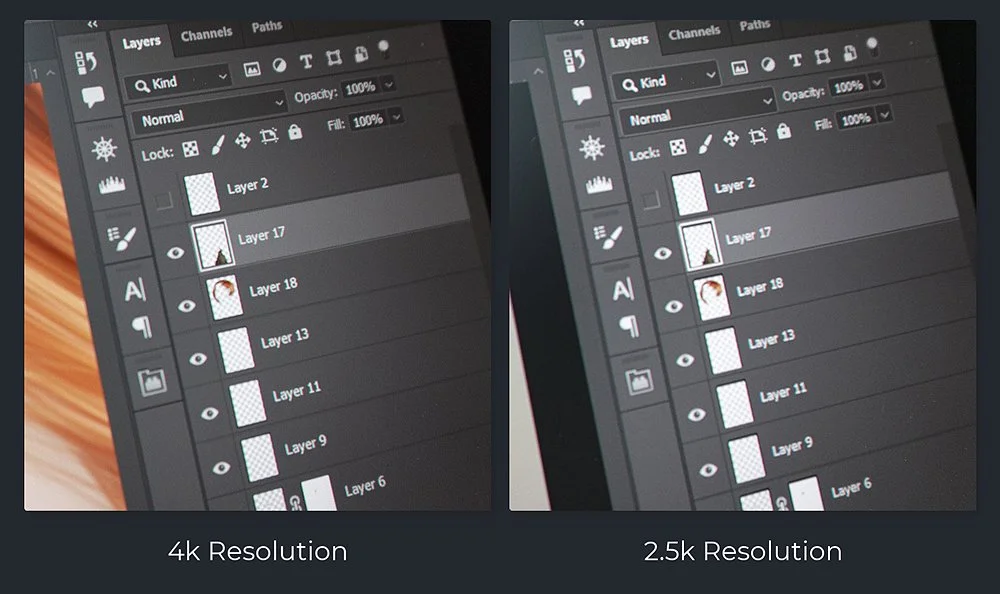
If the Pen Display 16 had a QHD screen instead, that could possibly mean a lower price, making it available to a wider audience for little, if any, difference in quality.
Configuration
The Xencelabs software is streamlined and easy to use. It focuses on the main functions of each device without being bloated with lots of extra options which you will never use. You are simply given a choice of what’s currently connected and when you select one, it opens its options.
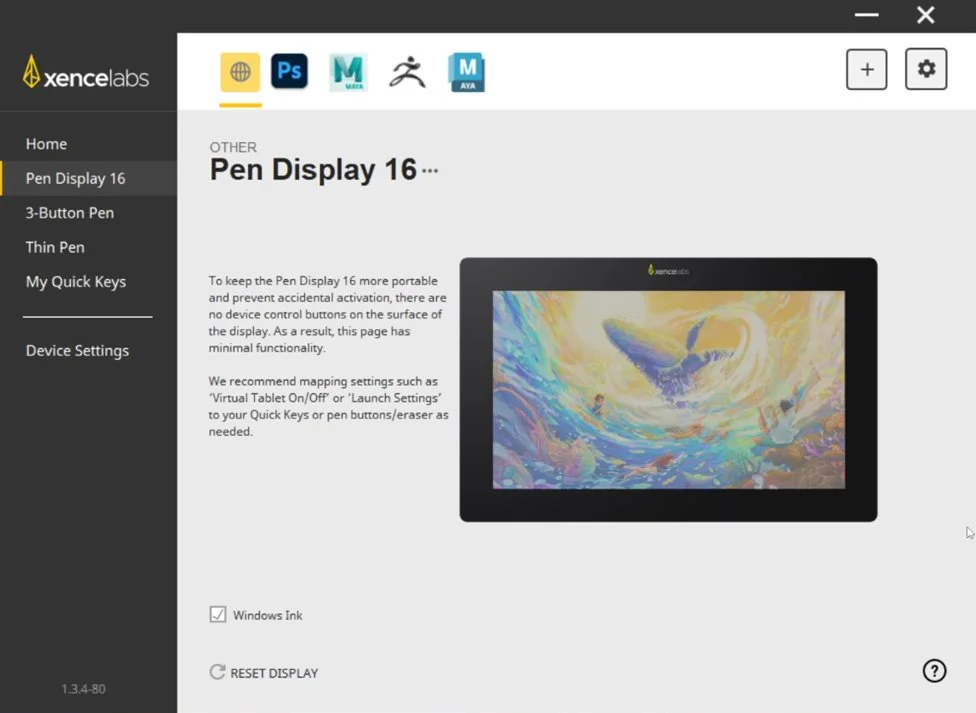
There are no configurable buttons on the Pen Display 16, so there are no real options available under its section.
All you can do here is enable or disable Windows Ink.
With each pen we can change what the buttons and the eraser do. I prefer to have the first button as my Alt key as I use this most often both in Photoshop and Maya. I then like to have the second button as my right click, and the third as a middle mouse click.
There are lots of options available. You can define a mouse click or a modifier. You can also choose from options which effect the display, general navigation or run a specific application.
You also have control over the pen pressure with this slider to change how the pen feels, so softer or harder. If you want more control you can dive into the advanced settings and fine tune the curve to your exact specifications, plus test the output as you go.


Next, we have the Quick Keys remote, and this has lots of configuration options too. What I love is that each button has a label which is visible on the OLED display and these can be changed, so as you’re working you can see what that button will do. Such a great feature as I’m always forgetting what’s assigned where.

There are eight main buttons, plus a separate one at the bottom. This is used to swap between each set, A to E, and these can all be configured differently. So, for each application you can effectively have forty different buttons at your fingertips.
With the dial you can also swap between four different modes, with the default being to scroll, zoom, rotate or change the brush size. Again, these can all be changed too and the button in the middle of the dial used to swap between them.
Also, under the customize menu you can change the orientation of the text, so if you use the remote in a specific way you can change the text to match. Myself, I use it upside down, so with the dial closer to me as I use that most often.
All these can be configured differently for each application you use, and it switches automatically. Don’t worry though, if you don’t have time to set everything up for each application, the software offers a default setup for the more popular apps which gives you a good head start.
The only thing I would love to see are more application specific options like Huion do with their software. So when choosing an option for Photoshop for example, it would list the more common commands to save me having to hunt out the hotkeys myself.
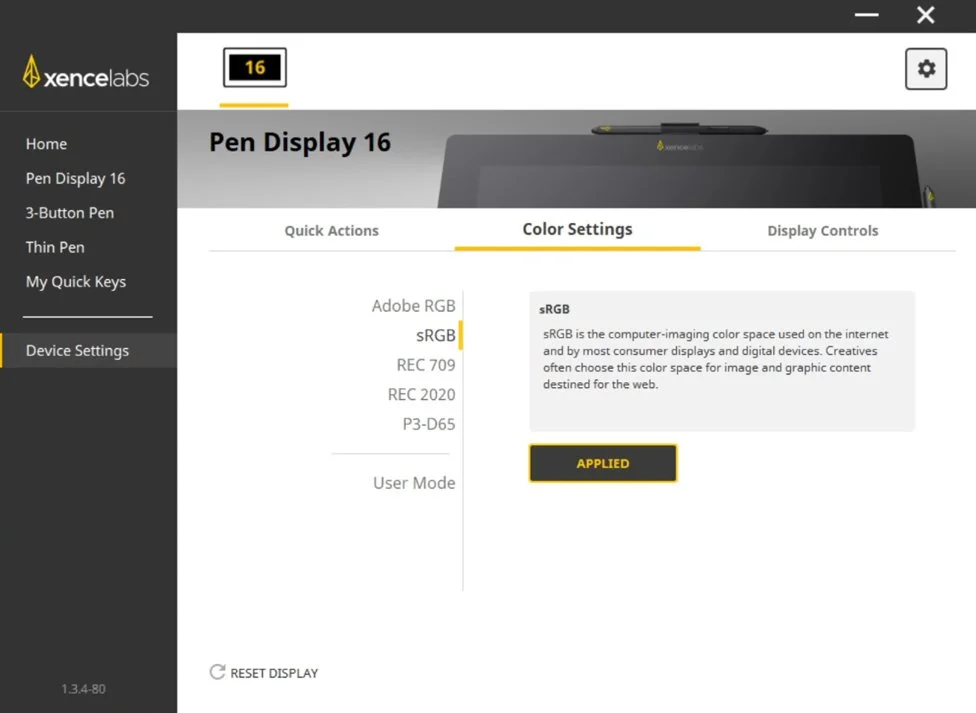
Finally, under Device Settings, you can choose what colour space you want to work in and there are lots to choose from here.
The Tablet in Use
As usual the first thing I like to do with any tablet are some basic line tests, just to check how the pressure holds up, how steady the lines are and if there is any lag.
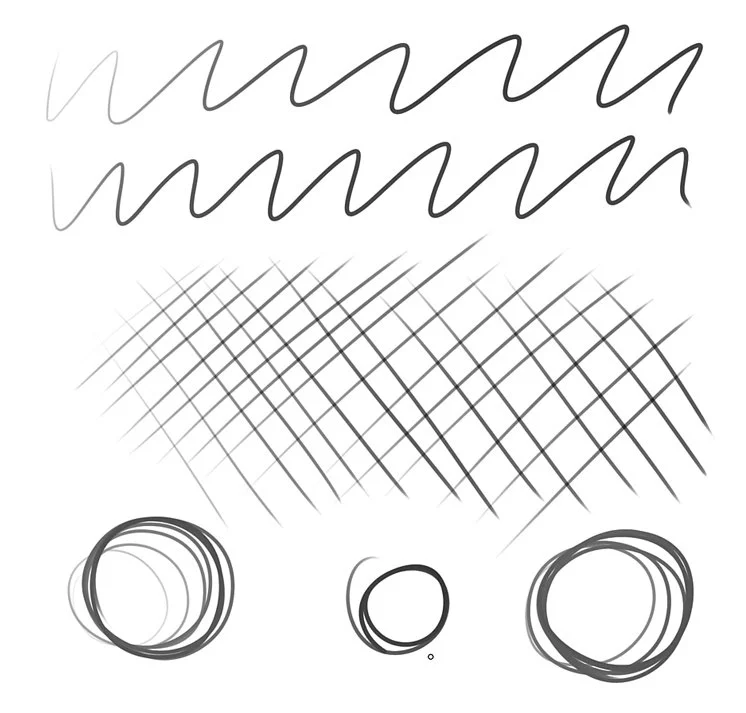
Firstly, the eight thousand levels of pressure sensitivity came through beautifully, and the experience of drawing on the screen felt nice too. Silky smooth but with a bit of bite.
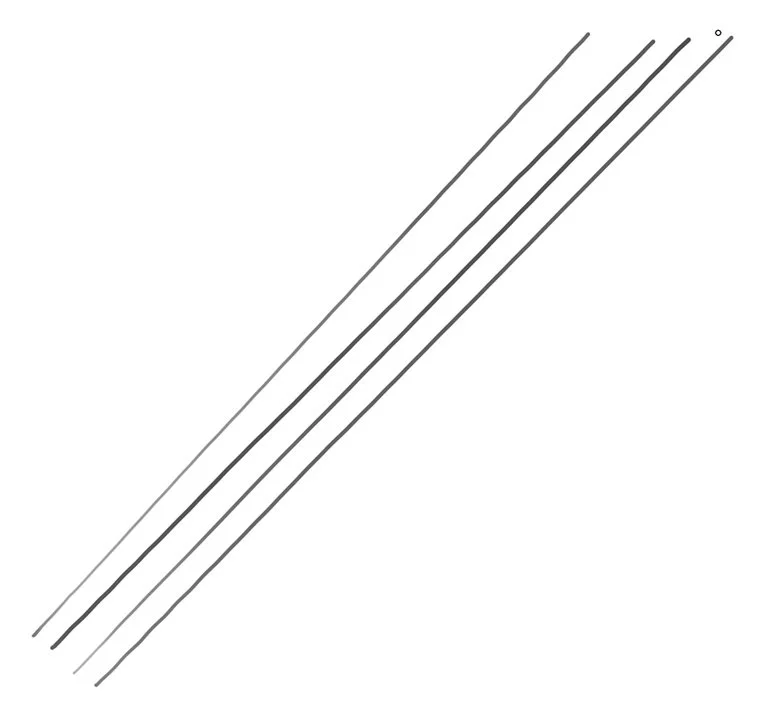
I next used a ruler to test for any jitter and unfortunately, I did detect a slight wobble in some of the lines.
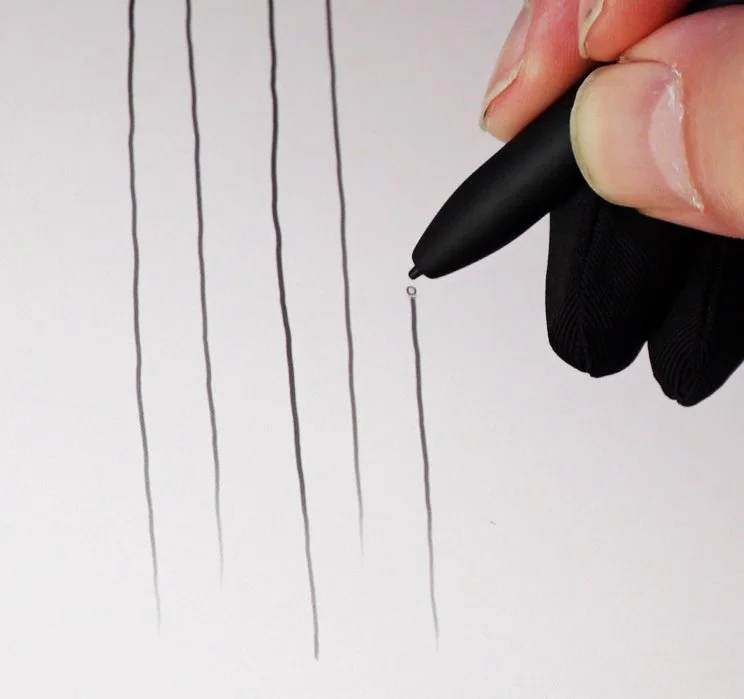
I felt I needed to test this further so I drew some slower, steady lines and you can clearly see some deviation from the strokes here, even with smoothing on in Photoshop.
As for lag, there was a little which you will be able to see in the main review video, but not enough to affect your work. Lag always looks worse on camera anyway.
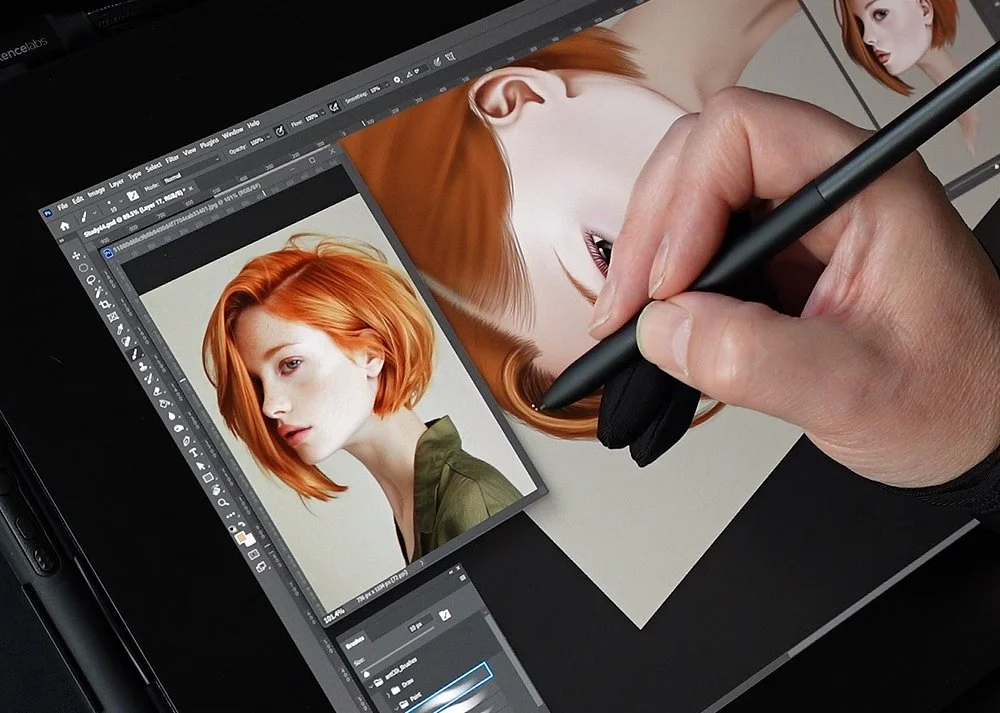
With those tests done it was time to get to work, so I started to create a simple portrait to try the pen display in real world conditions and just like the 24, the Pen Display 16 performed excellently.
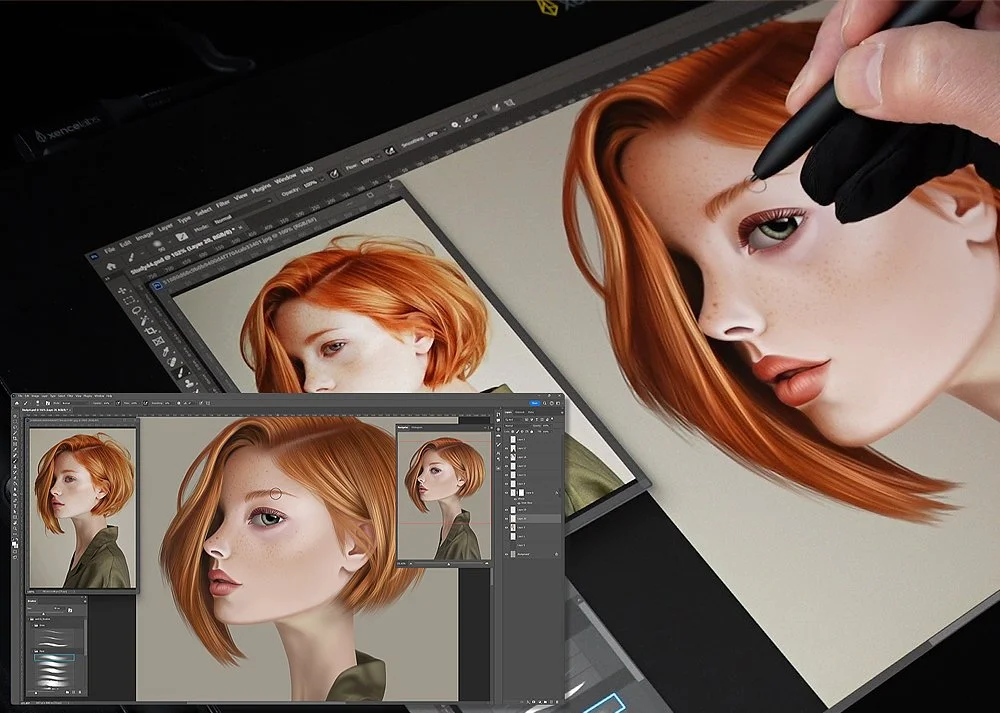
The pen strokes were silky smooth, and each held the screen as you moved across it. The display itself is gorgeous with bright crisp colours and deep inky blacks making everything pop.
I also had no issues with the drivers, the software was stable, and I wasn’t plagued by any bugs. The device also remained cool while I worked, even after a few hours I didn’t notice any sudden rise in temperature.
Again, like the Pen Display 24, the only thing I missed was a touch screen, and perhaps Xencelabs could supply a cradle for the Quick Keys remote so it could hang off the side of the display too, like they do with the 24, but these are small niggles.
Should You Invest?
Theres no getting around it, the Pen Display 16 is certainly on par with the Pen Display 24 in terms of quality. It’s an excellent product which does what it does extremely well. The screen is stunning, its light and very portable plus great to work on. The build quality is good too which makes me confident I will be using this device for many years.
Yes, there’s no touch screen and the pen strokes aren’t as stable as you would expect, plus at over a thousand pounds for the bundle, it is edging more towards the expensive price bracket.
With that in mind you would need to consider your priorities, if you decide to buy one, but if money isn’t an issue, I’d recommend you go for the bundle. You wouldn’t be sorry; it’s a great device and the Quick Keys remote is an excellent companion.
Alternatively, if you have are looking for a bigger display and have the budget to cover it, check out my Xencelabs Pen Display 24 review.
Although Xencelabs supplied the Pen Display 16 for me to test, the opinions offered in this review are my own.