Modules & Blueprints
The way aRT works is you have a list of modules at your disposal, arms, legs etc. and you build a blueprint from these modules. So, for example, a biped blueprint would consist of a spine, leg, arm, and head module.
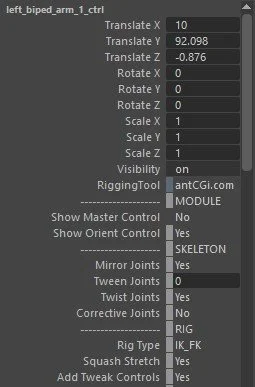
Each module has its own global control which can be used to position or scale it. This also holds important data on how that module will be rigged when the rig is generated.
-
Will make a copy of the global control visible. You can use this to help reposition the modules global control when the rig is generated. This Is useful if the module global control is hidden inside the model.
-
Will show or hide the main global control used for adjusting the overall orientation of the locators.
-
Will dictate whether that module should be mirrored, so a left arm for example may need to be mirrored to create the right arm.
-
Adds an extra locator between the current one to create a higher detail rig.
-
Will show any twist or roll joint locators and apply them to the rig.
-
Will add corrective joints to the module (to be added).
-
Is where you choose the type of rig you want generated. This can be a basic FK rig, IK and FK rig, Spline IK and even Dynamics driven.
-
Will make the module stretchy.
-
Will generate a ribbon-based module along with controls for the ribbons, which gives the animators more freedom.
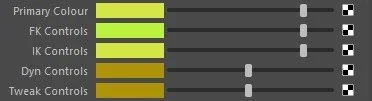
There are some attributes which are only found in the Attribute Editor and these are used to change the colours of the controls.
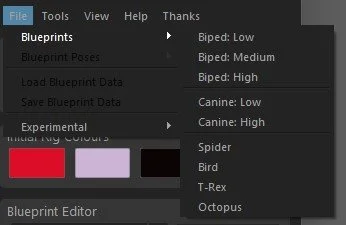
Blueprints are essentially collections of modules, put together to form a base for a rig. This can then be saved and used to quickly generate future rigs on different models.
aRT comes with a selection of predefined blueprints to quickly get you started, and these can be found in the File menu, under Blueprints.
Locators
Each module is built up from locators, with each representing the placement and orientation of a joint.
These have the axes visible and are usually pointing towards the next locator in the chain. They will continue to look at the next locator even if you move them.
Some locators don’t have the axes and that is because these are used more to dictate the position of a control which is generated when the rig is built. This could be a pole vector control, or a joystick for the hands and feet.
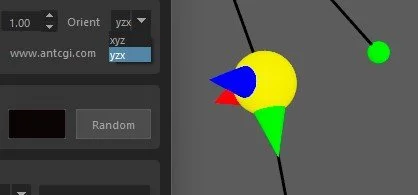

By default, the x-axis will be the primary axis, but this can be changed using the Orient drop-down box.
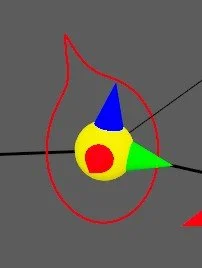
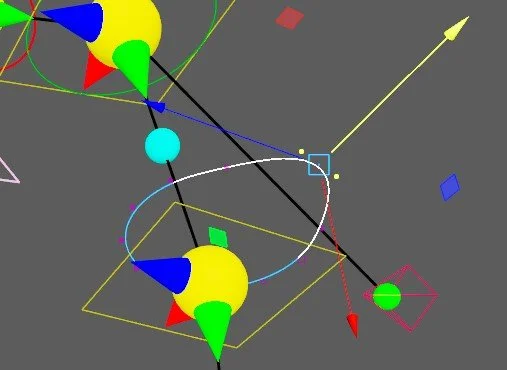
If you need to change which way the other axes are pointing, there are two options. Firstly, you can adjust all the locators on the module using the orient control, which is the red circle at the base of each module.
Alternatively, you can use the Adjust Orientation attribute found on each locator to edit them individually. These options will twist the locators around the primary axis.
Special Locators
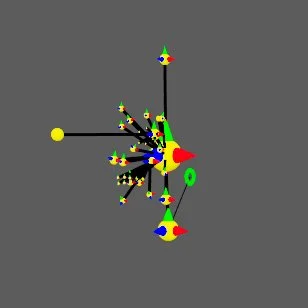
As mentioned previously, some modules have more specific locators which perform certain roles, so lets look at some of those now.


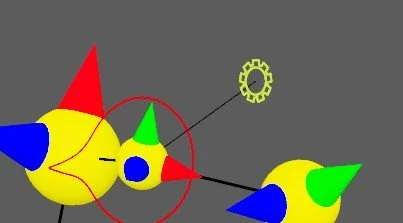
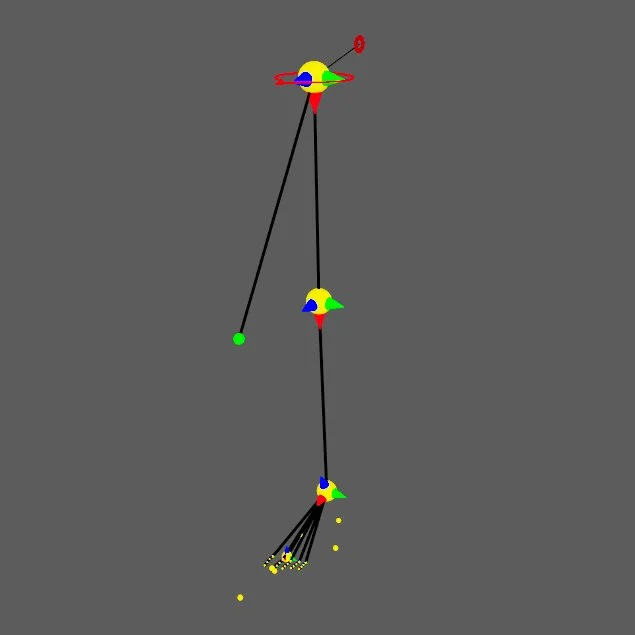
Two of the more common locators are the twist and tween locators.
Above you can see two images. On the left you see we have two blue locators on the arm, these are the twist locators used for the twist and roll joints in the rig. You can reposition these closer to the shoulder and wrist if preferred. You will find these mainly on limb type modules.
On the right you will notice the spine and the arm have additional red locators between the main ones, these are tween locators. This tells the tool to add extra joints into the skeleton, to be used however you like, although they are mostly used with the ribbon controls.
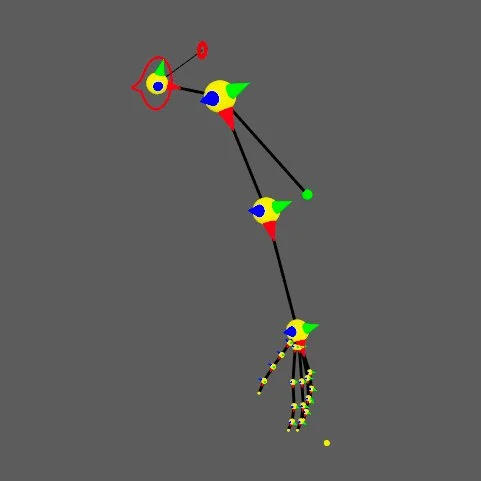
Also on the limbs you will find a green locator either behind or in front of the module, these are used to position the pole vector controls.
With the arm you also have a locator at the end of the arm, in front of the hand. This is used to position the hand control, which is a joystick type control used to quickly pose the fingers.
This allows you to move it if the control isn’t in an ideal position.
With legs you will see five extra locators near the foot. These are used to help when building the foot controls.
The inner and outer position locators dictate the pivot point when the foot banks.
Whereas the front and rear position locators help show where the foot should pivot when moving back onto the heel or onto its toes.
In front you have a foot position locator and this is used to place the main foot joystick control, the main control used to animate the foot.
The head modules have a few key locators you should be aware of.
Firstly, the eye pivot position locator is used to move the pivot point for the eye which the eyelids will move around. This is used for eyes that are not the usual shape or size.
The eye aim locator shows the tool where the main look at control should be placed. This should ideally stay in front of the eyes.
Control Icons
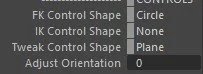
Each locator has a series of Control Shape attributes, and these allow you to choose a control shape which will be used when generating the rig.
So, the FK Control Shape will be used for the FK controls, IK Control Shape for the IK controls etc.
These controls are visible on the locator, and you are free to move, rotate and scale them. Don’t worry about the transform values or the pivot as these are reset once the rig is built.
You can even edit the CV’s directly to sculpt the control to fit your model.
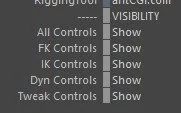
To make editing the controls and locators easier you can quickly change the visibility of them with the attributes found on the rig_blueprint_ctrl control.
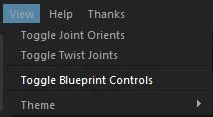
You can also do this quickly with the Toggle Blueprint Controls found in the View menu.
Special Controls

There are lots of controls needed in the head rig, so to make use of existing controls that we have but aren’t used, they have been repurposed for other controls.
Jaw IK Control - Mouth Move Control
Head IK Control - Head Aim Control
Teeth FK Controls - Teeth Controls
Eye FK Control - Eye Move Control

With the hands, we use the first finger locators IK control as the metacarpal controls. These will show up by default as the diamond shape.
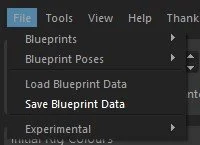
Load and Save Blueprint Data
When you have spent time positioning locators and editing the controls to fit your model perfectly it’s recommended to save the blueprint data. You can do this through the File menu.
This will store the positions of everything for you, including any edited CV’s, so you can quickly reload them if you need to regenerate the rig.
It won’t currently build the modules for you, so they need to exist first, but this is an option I will be looking into in the future.