Building a Blueprint

First choose a global scale for the overall blueprint as well as the orientation of the joints.
With the scale, a value of 1 will be fine in most cases but if you are working on a larger or smaller character adjust this to make sure the control and locators are scaled correctly.
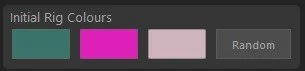
Next choose the colours you want to use for the controls with the swatches in the Initial Rig Colours section. You can use the Random button to quickly generate some options for you if you aren’t sure what to pick.
Also bare in mind that the control colours will be generated with slight variations of these initial colours, this is to help them be more distinguishable between type so they don’t all look the same when active. For example, the tweak controls and FK controls can be visible at the same time, so if they are the exact same colour it can make the rig more confusing to work with.
Don’t worry, you can change these colours later using the attributes on the module control.
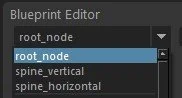
Initially you will need to choose a starting point for the blueprint, and this can be either a spine or a simple root node, which is just a single locator. With the spine you have the option of a vertical one for bipeds and a horizontal one for use with quadrupeds.
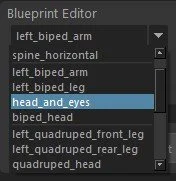
Once the initial module has been generated all the other modules will become available to add.
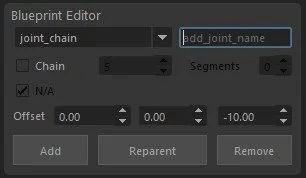
To add one simply select it from the menu, select a locator you wish to parent it to and then click Add.
If you need to change its parent simply select any locator on the module, then hold Shift and select the new parent for the module.
Now click Reparent.
If you need to remove a module, select a locator on the module you want to remove and click Remove.
This is the only way you should remove modules to ensure all the relevant data has been deleted and updated. Manually removing them will break the rig and the tool won’t work.
There are more options available to you when adding a module and some of these will change depending on the module you are adding.
When creating an arm or a leg you will be given the option to include fingers and toes, and specify how many. You will also have the option to choose how many segments are in each digit too.
When adding an arm, you can also choose to include a metacarpal joint and rig too.
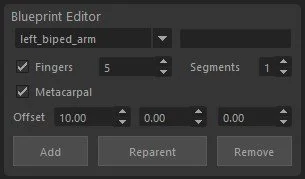
The Offset values change the position of the module, adding the offset from the selected parent locator. This is also used to dictate the positioning between locators when creating a joint chain.
While on the subject of Joint Chains, with this option you will also be prompted to give the chain a name.